ENROLLING IN BILL PAY
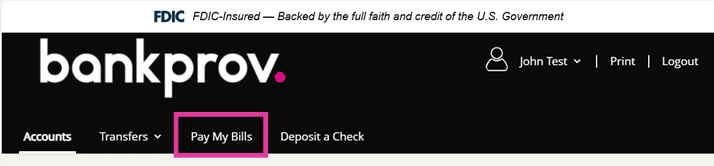
1. Log into your online banking profile, click Pay My Bills from the top menu.
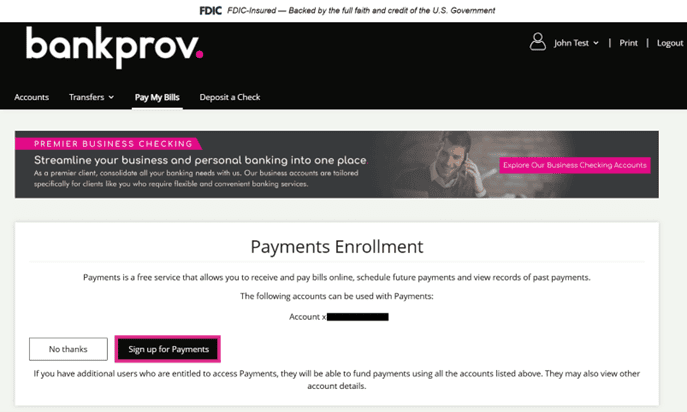
2. On the next screen, it will show any accounts that are eligible for Bill Pay. Only Checking and Money Market accounts can be used to initiate payments through Bill Pay. To continue with enrollment, click Sign Up for Payments.
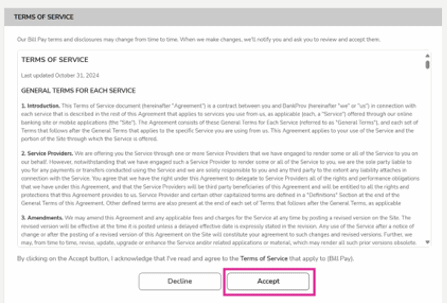
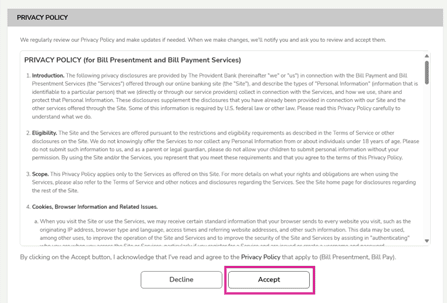
3. The Terms of Service Agreement and Privacy Agreement will be presented on the following screens. Review the agreements, then click Accept.
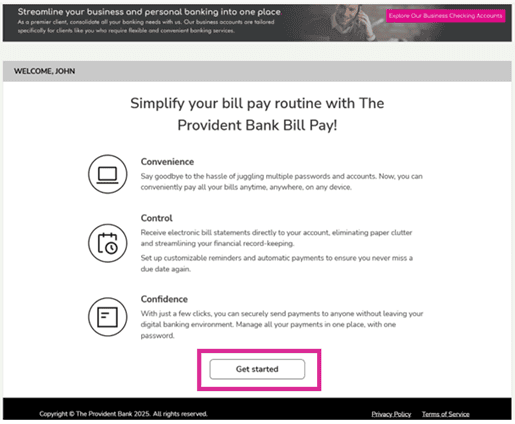
4. The following screen shows a few of the benefits of utilizing the Bill Pay system. Click Get Started to continue.
5. You have successfully enrolled in the Bill Pay service and are able to set up payments.
CREATING NEW BILLERS IN BILL PAY
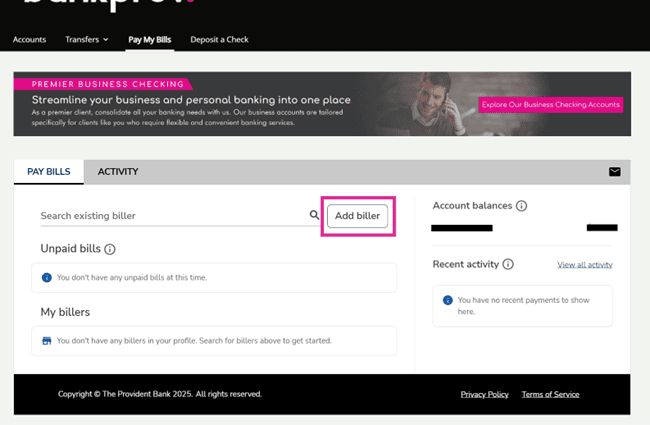
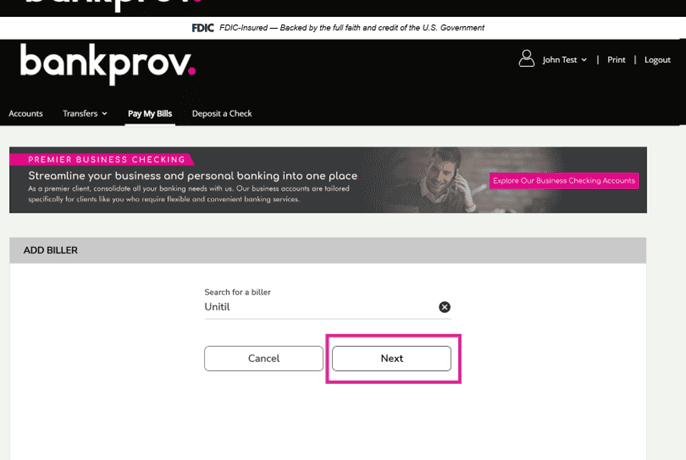
1. From the Pay My Bills Screen, click Add Biller.
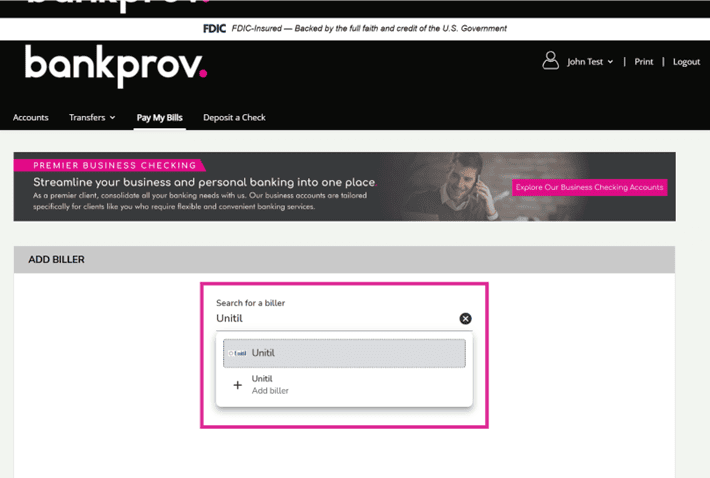
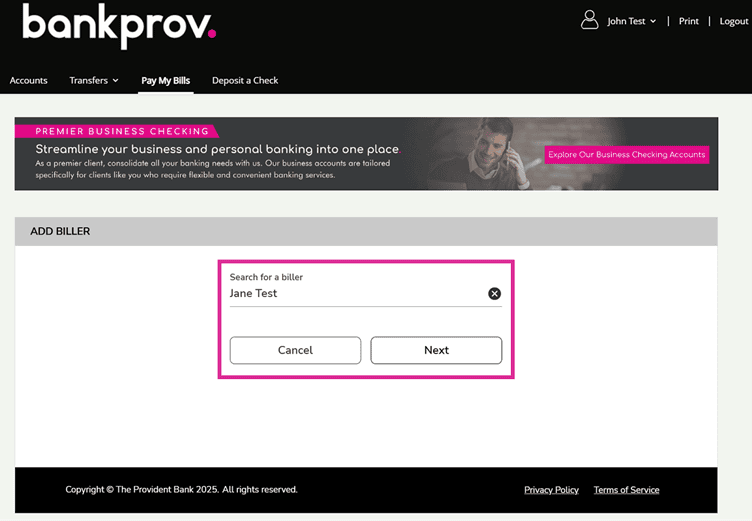
2. Type the name of the Company or Person that you would like to send payments to.

3. If it is a company that our Bill Pay provider is familiar with, the name will appear below the search bar. If it is the correct payee, click the name of the payee, then click Next to continue.
If the drop down does not reflect the correct payee, then click the + Add Biller option and it will take you through the steps to manually add the biller information (shown on step # 4). If the Biller Name did not populate at all, skip to step # 4.
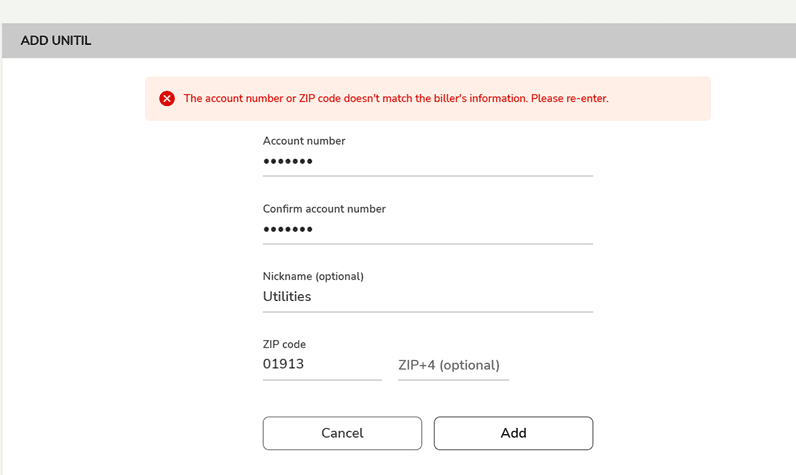
a. The following page will ask for the account number you have with the biller as well as the zip code. If you have more than one zip code, it is recommended to provide the zip code of your billing address. When completed, click Add.

**If you receive an error message stating that there is a problem with the account number or zip code, please reach out to the biller to ensure the information you have matches their system.
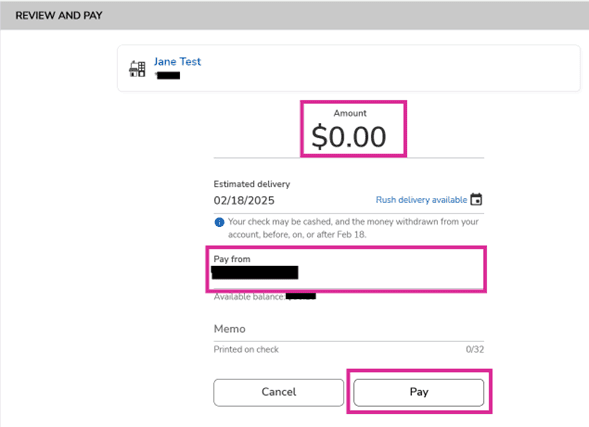
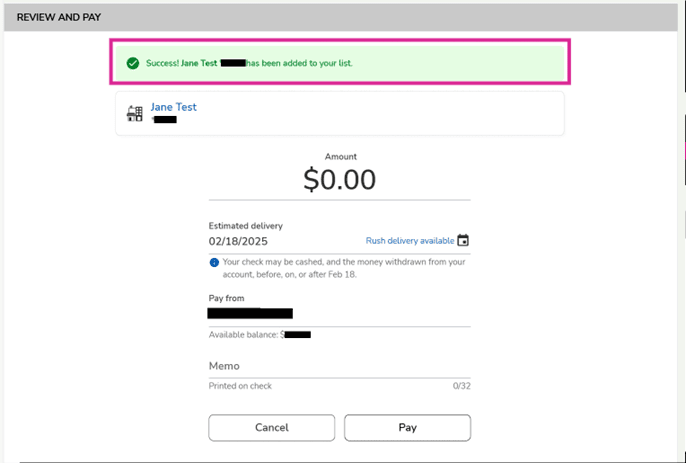
b. On the following screen, you will see a confirmation that the Biller has been added. If you are ready to make a payment to this biller, there is a place below the confirmation to put in the payment amount as well as a memo. It will also show the estimated delivery date of the payment. Once completed, click Pay to initiate the payment.
4. If the biller’s name did not populate when typed into the search bar, click Next.
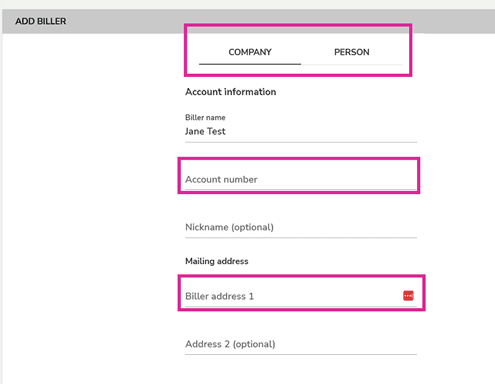
a. At the top, select if this is a Company or a Person, then input the necessary payment information such as:
i. Account Number (your account number with the company/person you are sending the payment to).
ii. Address (the address you would like the payment sent to)
iii. Biller’s Phone Number
b. Once the information has been provided, click Add.
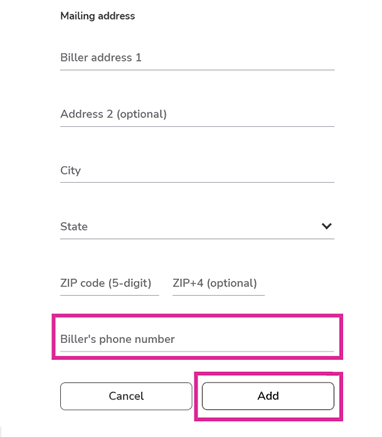
c. On the following screen, you will see a confirmation that the Biller has been added. If you are ready to make a payment to this biller, there is a place below the confirmation to put in the payment amount as well as a memo. It will also show the estimated delivery date of the payment. Once completed, click Pay to initiate the payment. If you do not wish to make a payment, you can click Cancel to be redirected to the Bill Pay screen.
INITIATING A PAYMENT TO AN EXISTING BILLER
1. On the Pay My Bills screen, find the Biller that you would like to send a payment to, then click Pay.
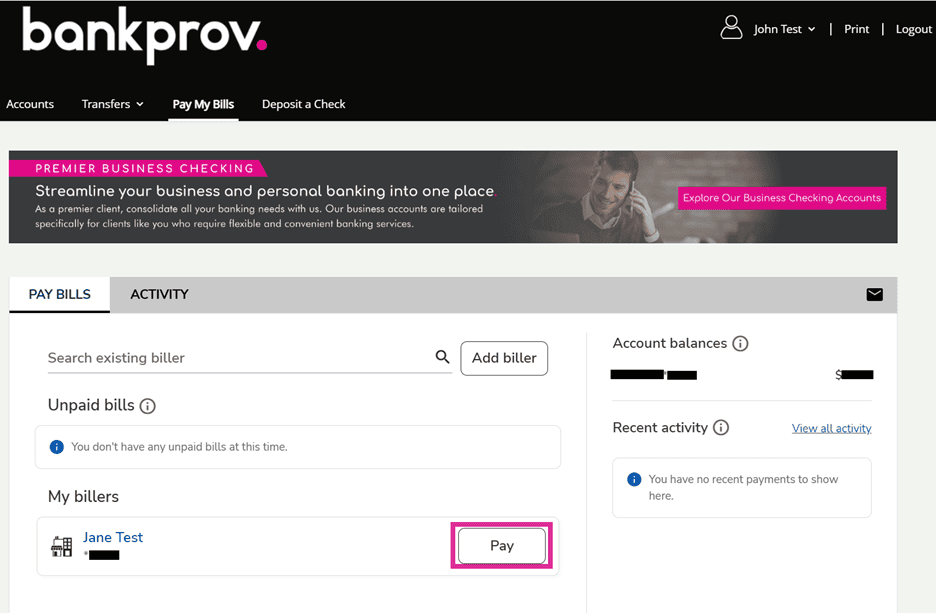
2. Input the amount of the payment, select the BankProv account that you would like the payment to be made from, complete the memo (optional), then click Pay.